
Zen and the Art of Home Networking
Originally Posted: October 16th, 2021
Zen and the Art of Home Networking
Life is Too Short for Bad Wi-Fi
My home network had humble beginnings. It started as a single all-in-one Wi-Fi router and evolved through a series of mesh systems. They weren’t the best solution, but they were the easiest. I knew I would get better performance by connecting my access points via Ethernet, but my house didn’t have any. Installing Ethernet cabling in a house requires skill, tools, and materials. It also requires more effort than plugging in a few Eeros, which is why I compromised for so long.
Before you call me a hypocrite, let me explain. When you do something as your full time job, you probably don’t feel like doing it at home. I doubt many plumbers relax on a day off by fixing their own leaking pipes. That’s how it is with me and networking, at least. Networking isn’t a fun hobby. It’s my job. On the weekends I’d rather be writing, or doing literally anything else. Mesh networking worked well enough, but I was never satisfied.
I recently spent a weekend upgrading my home network. I want to share how I chose my current setup, and my thinking along the way. Hopefully this will give you some ideas about how to plan a new home network, or improve your existing one. Before we get into the equipment, we have to discuss my network requirements and why I wanted more than mesh.

My Wi-Fi test assistant hard at work
Network Requirements and Preferences
When planning a network, you should always consider how it is going to be used. Networks exist to serve a purpose. My home network is used for work, streaming, video chatting, gaming, browsing — you know, all the normal things. Since most of those are done wirelessly, my top design requirement was fast Wi-Fi everywhere.
I also wanted a few Ethernet ports in my office for devices I’m setting up or testing. Working from home turned my office into my workspace, lab, and config bench. Having a few Ethernet connections to my network would simplify my job, so I considered that my other hard requirement.
I also had a few preferences. I wasn’t satisfied with the level of control that most mesh systems gave me. I didn’t need a full-blown enterprise network in my house, but I wanted the flexibility of multiple networks and custom firewall rules. I wanted a full web interface, and would prefer to have all of my equipment managed in one place. More than anything, I wanted to feel like I was in control of my network. I didn’t want to lean on automatic settings, smartphone-app-only management, or a cloud service.
After deciding on my requirements, I started researching and planning. As I learned about specific vendors and models, I considered where to install and how many access points I needed.
Another important factor in network planning is where it’s installed. This is especially true with wireless, because AP location and the RF environment have a big effect on performance. Even the best equipment isn’t going to work well if you put it in the wrong place, or have a lot of interference. Luckily for me I don’t have a lot of RF neighbors, and my house is relatively easy to cover.
My house is a normal American-style brick, wood, and drywall construction with no existing Ethernet cabling. It has two main floors and a basement, each around 720 square feet (67 m²) with a 36 x 20 feet (11 x 6 m) floor plan. The interior drywall and square footage mean that one access point per floor is a good starting point. Two APs per floor is likely too much, especially with mesh systems that broadcast at the highest power possible. Having too many APs causes its own issues, mainly inconsistent roaming and erratic performance.
Having a single all-in-one Wi-Fi router on the first floor worked OK, but it didn’t cover the 2nd floor well. The mesh systems I’ve tested all improved coverage, but were limited by wireless backhaul. Even the best tri-band Wi-Fi 6 and Wi-Fi 6E systems aren’t able to beat the performance of wired backhaul. To build the network I wanted, I needed Ethernet and multiple APs. The locations for my APs were determined by where I was able to run cables easily, but also the building materials and size of the house.


AP Placement Guidelines
Wi-Fi can cover long distances with the right equipment and a clear path. When you have walls in the way, you typically don’t want an AP to cover more than 30 feet (9 meters) and/or 2 walls away. My floor plan is small enough that a single AP centrally located on each floor should cover everything. This is true for my house thanks to the relatively RF-transparent wood framing and drywall. It’s not always true when the interior walls are made of a denser material, or there are other sources of attenuation.
Speaking of attenuation, the brick exterior walls make my yard challenging to cover. Brick significantly attenuates Wi-Fi signals, especially 5 GHz. The best way to solve this is to get Ethernet run to an outdoor AP. If Ethernet isn’t possible, an outdoor AP using wireless backhaul may help. As a general rule, any AP outside will work better than even the best AP inside. That’s true with most buildings that have concrete, brick, stone, or metal walls.
After considering my requirements and layout, I decided on a rough placement plan. I wanted one AP on the 1st floor, one AP on the 2nd floor, and one outdoor AP. Covering the basement wasn’t a priority, so three access points would be enough. Next, I had to determine where I was able to run Ethernet, and how I was going to connect everything to my existing Internet connection.
As I mentioned, my house doesn’t have any existing Ethernet cabling. My Verizon FiOS Internet connection terminates in the basement, where the Optical Network Terminal (ONT) is. The ONT translates fiber into Ethernet, handing out a public IPv4 address to anything I plug in. From there, the ONT has a single Ethernet connection run to a 1st floor closet on the left side of my house, where the Verizon technician placed an all-in-one Wi-Fi router. For a while, that was my entire home network.
This was around the time I started reviewing Wi-Fi equipment. It was a fun hobby, but it was also a way to research what would work well in my house. I tried the UniFi Dream Machine with the BeaconHD, and many different mesh Wi-Fi systems. Besides the UDM, I tested the Eero 6 and Eero Pro 6 the longest. They worked well enough to encourage my home network procrastination.
The biggest obstacle to running Ethernet in my house was finding a place to do it. I followed water pipes, opened access panels, and looked everywhere I could think of. I couldn’t find a place to make an easy run from the basement to the 2nd floor. The best solution would have been to drill into the drywall and use fish tape. I also could have installed some cable raceways. That all sounded like a lot of work.
I ended up getting creative and using a mix of my attic space, HVAC, and the existing pathway that the Verizon technician had made. I grabbed some outdoor-rated and some plenum-rated Ethernet and I was on my way. I ran a new cable to the 1st floor closet, and several to my office on the 2nd floor. I also ran one outside, which would be used for my outdoor AP. I was finally ready to install and setup the network.
This probably isn’t a surprise, but I chose UniFi. I have plenty of negative things to say about Ubiquiti. Despite my complaints, UniFi checks most of my boxes. It helped that I already had most of the equipment I needed. This made other options more expensive, and helped me look past my reservations.
I considered other options, and I have an ongoing project to review UniFi alternatives. I tested Aruba Instant On this summer. Instant On is good at providing basic switching and Wi-Fi, but I don’t love the limited settings and the cloud-only management. I’m also (slowly) working on a review of TP-Link Omada. Omada is interesting, but I haven’t used it enough to pick it for my home network. For better or worse, UniFi was my best option. If you think there’s something better out there, let me know in the comments.
My Current Home Network
Router: UniFi Dream Machine
Switch: UniFi Switch Lite 8 PoE
1st Floor AP: U6-LR
2nd Floor AP: U6-Pro (Early Access)
2nd Floor Switch: USW-Flex
Outdoor AP: AC-Mesh
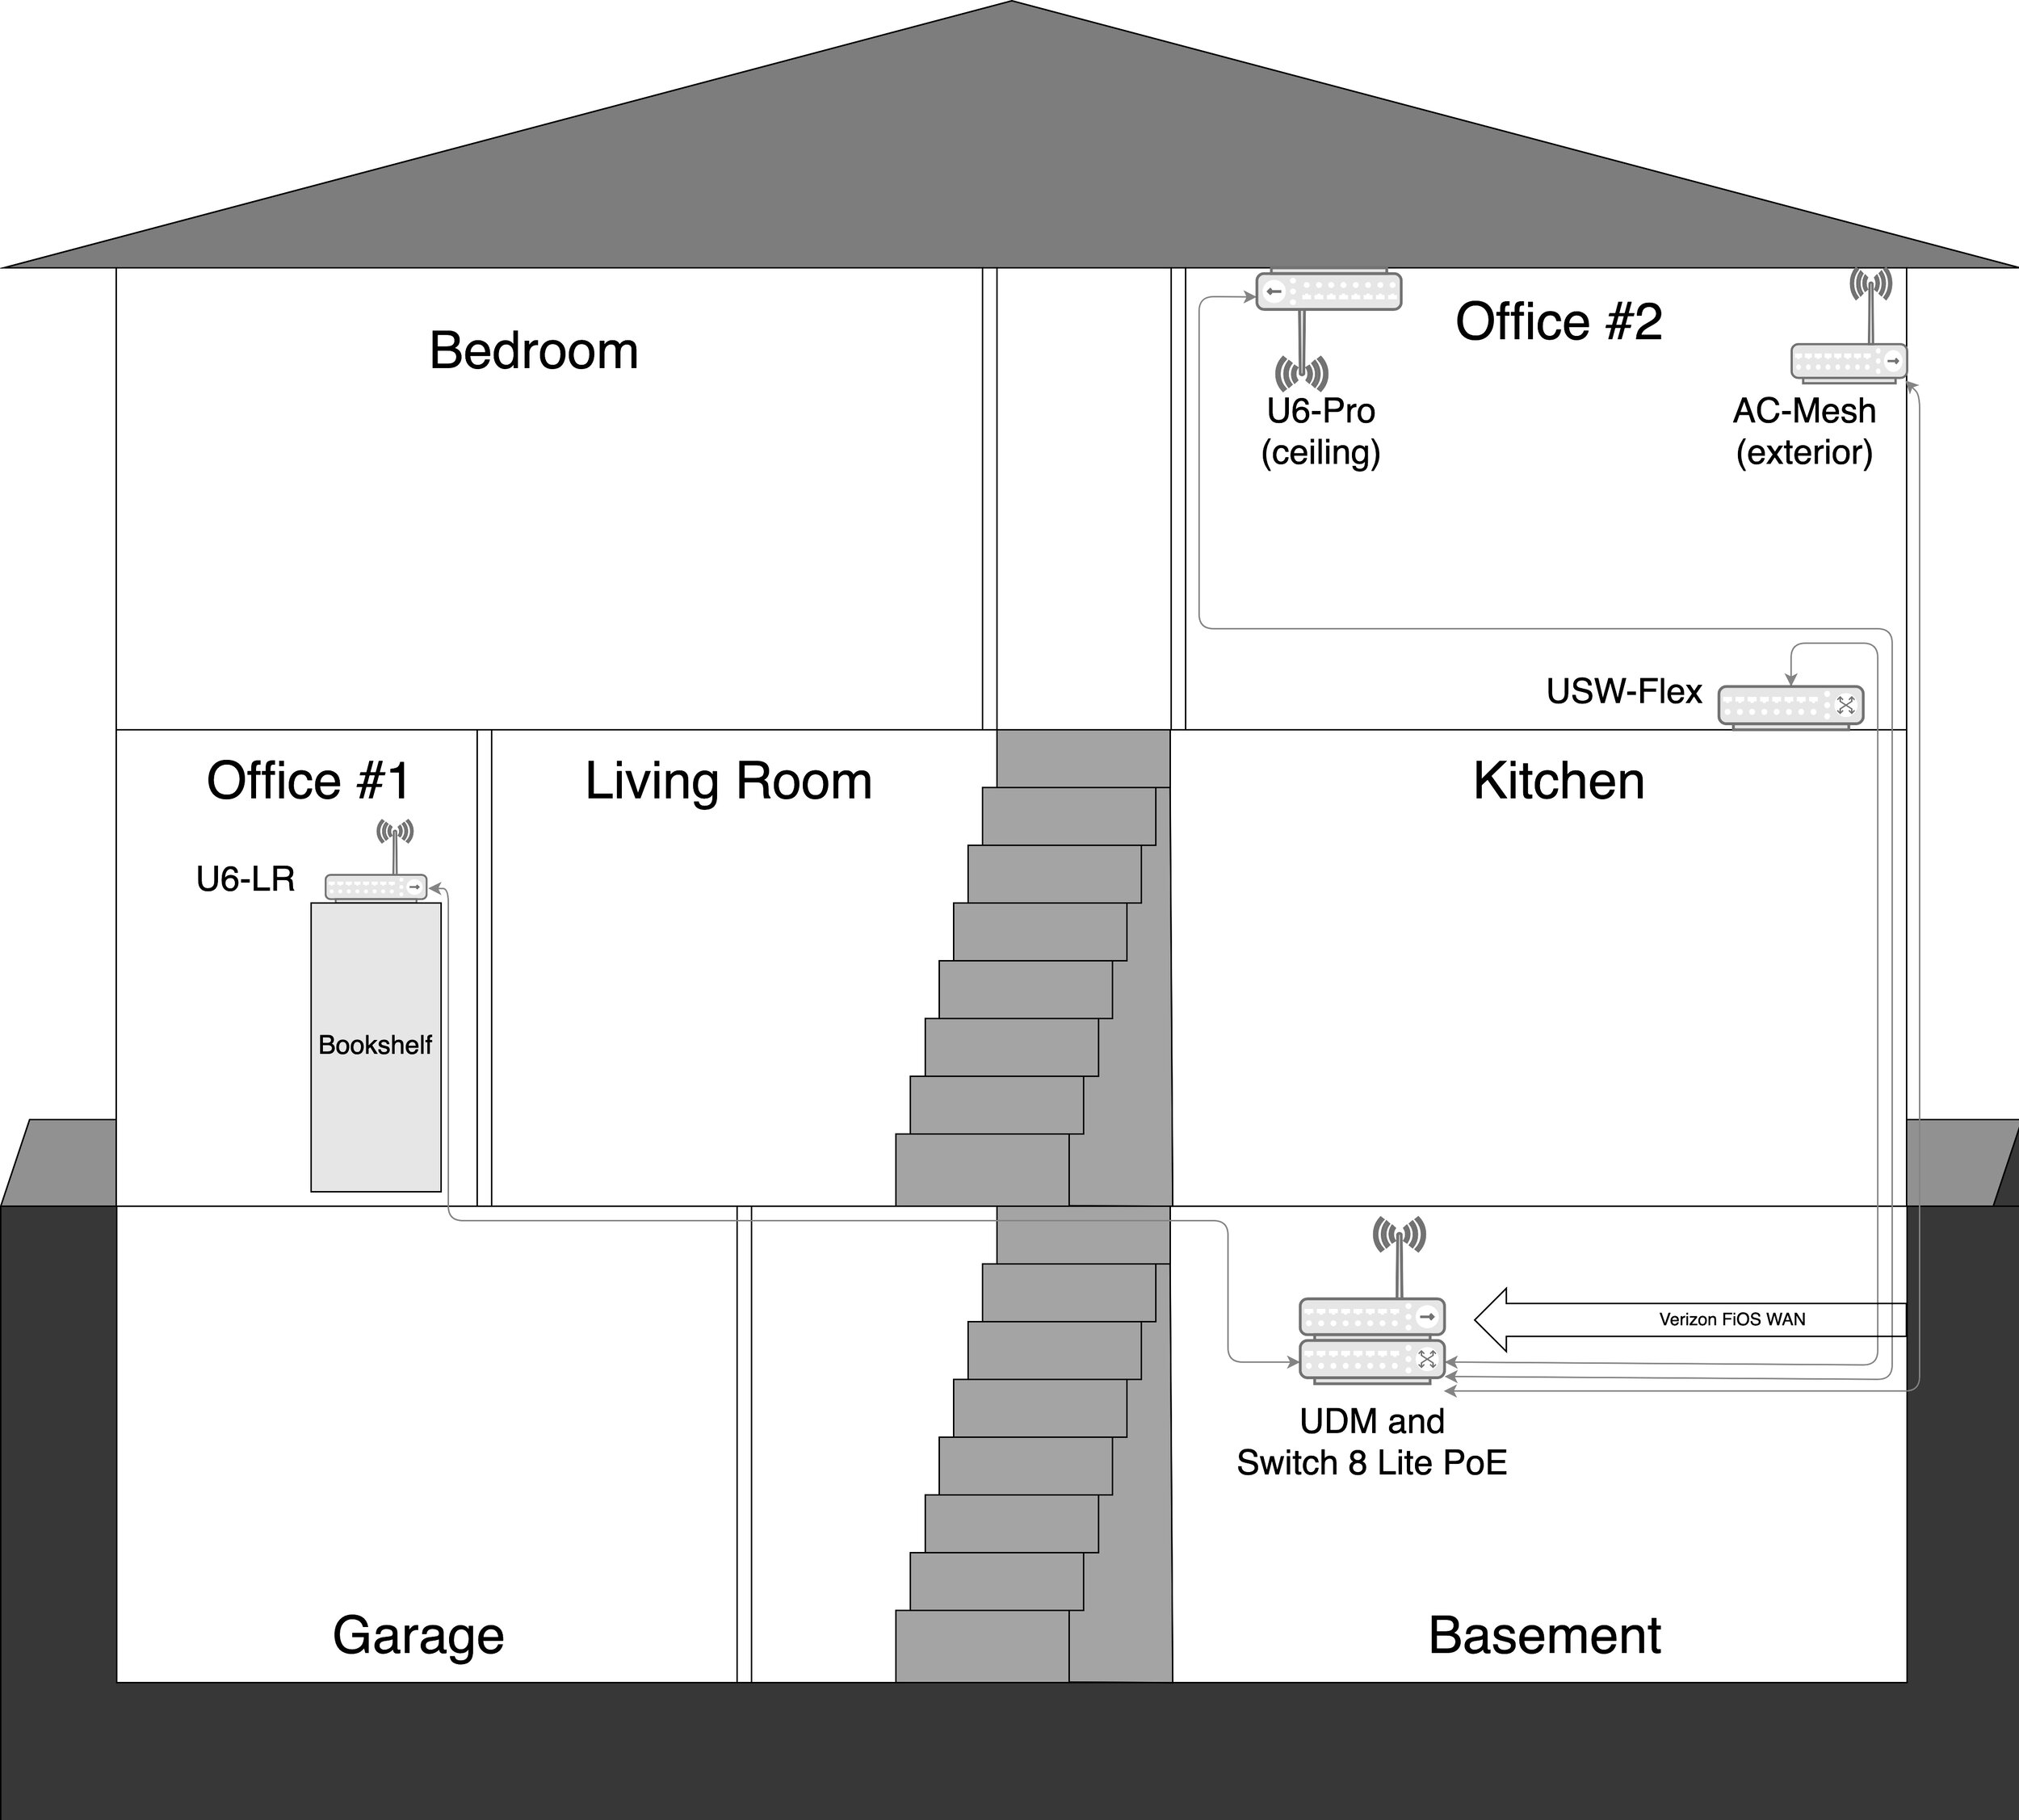
The layout of my current home network
Wireless is the most important part of my home network. The UniFi Dream Machine in the right side of my basement is my router and UniFi controller, but it also has a built-in 802.11ac Wave 2 AP. This provides Wi-Fi coverage in the basement, and fills in the coverage on the right side of the first floor.

1st Floor: UniFi 6 Long Range
On the 1st floor, I have a UniFi 6 Long Range AP sitting on a top shelf on the left side of the house. This placement allows for the U6-LR’s loud radios and long range antennas to flex their strengths. This AP does a good job of blanketing the 1st floor and the left side of the 2nd floor with fast 5 GHz connections. Ideally this would be mounted on the ceiling, but that’s a project for another day.
On the 2nd floor, I have my office on the right side. This is where the extra Ethernet cables run to, and where I have a U6-Pro mounted on the ceiling. This fills in the gap from the UDM in the basement, and the U6-LR a floor below on the opposite side of the house. The U6-Pro gives me fast wireless in my office, and the Ethernet is used to feed my Mac Mini, gaming PC, and a UniFi Switch Flex. The USW-Flex is used to power any PoE equipment I’m configuring or testing.
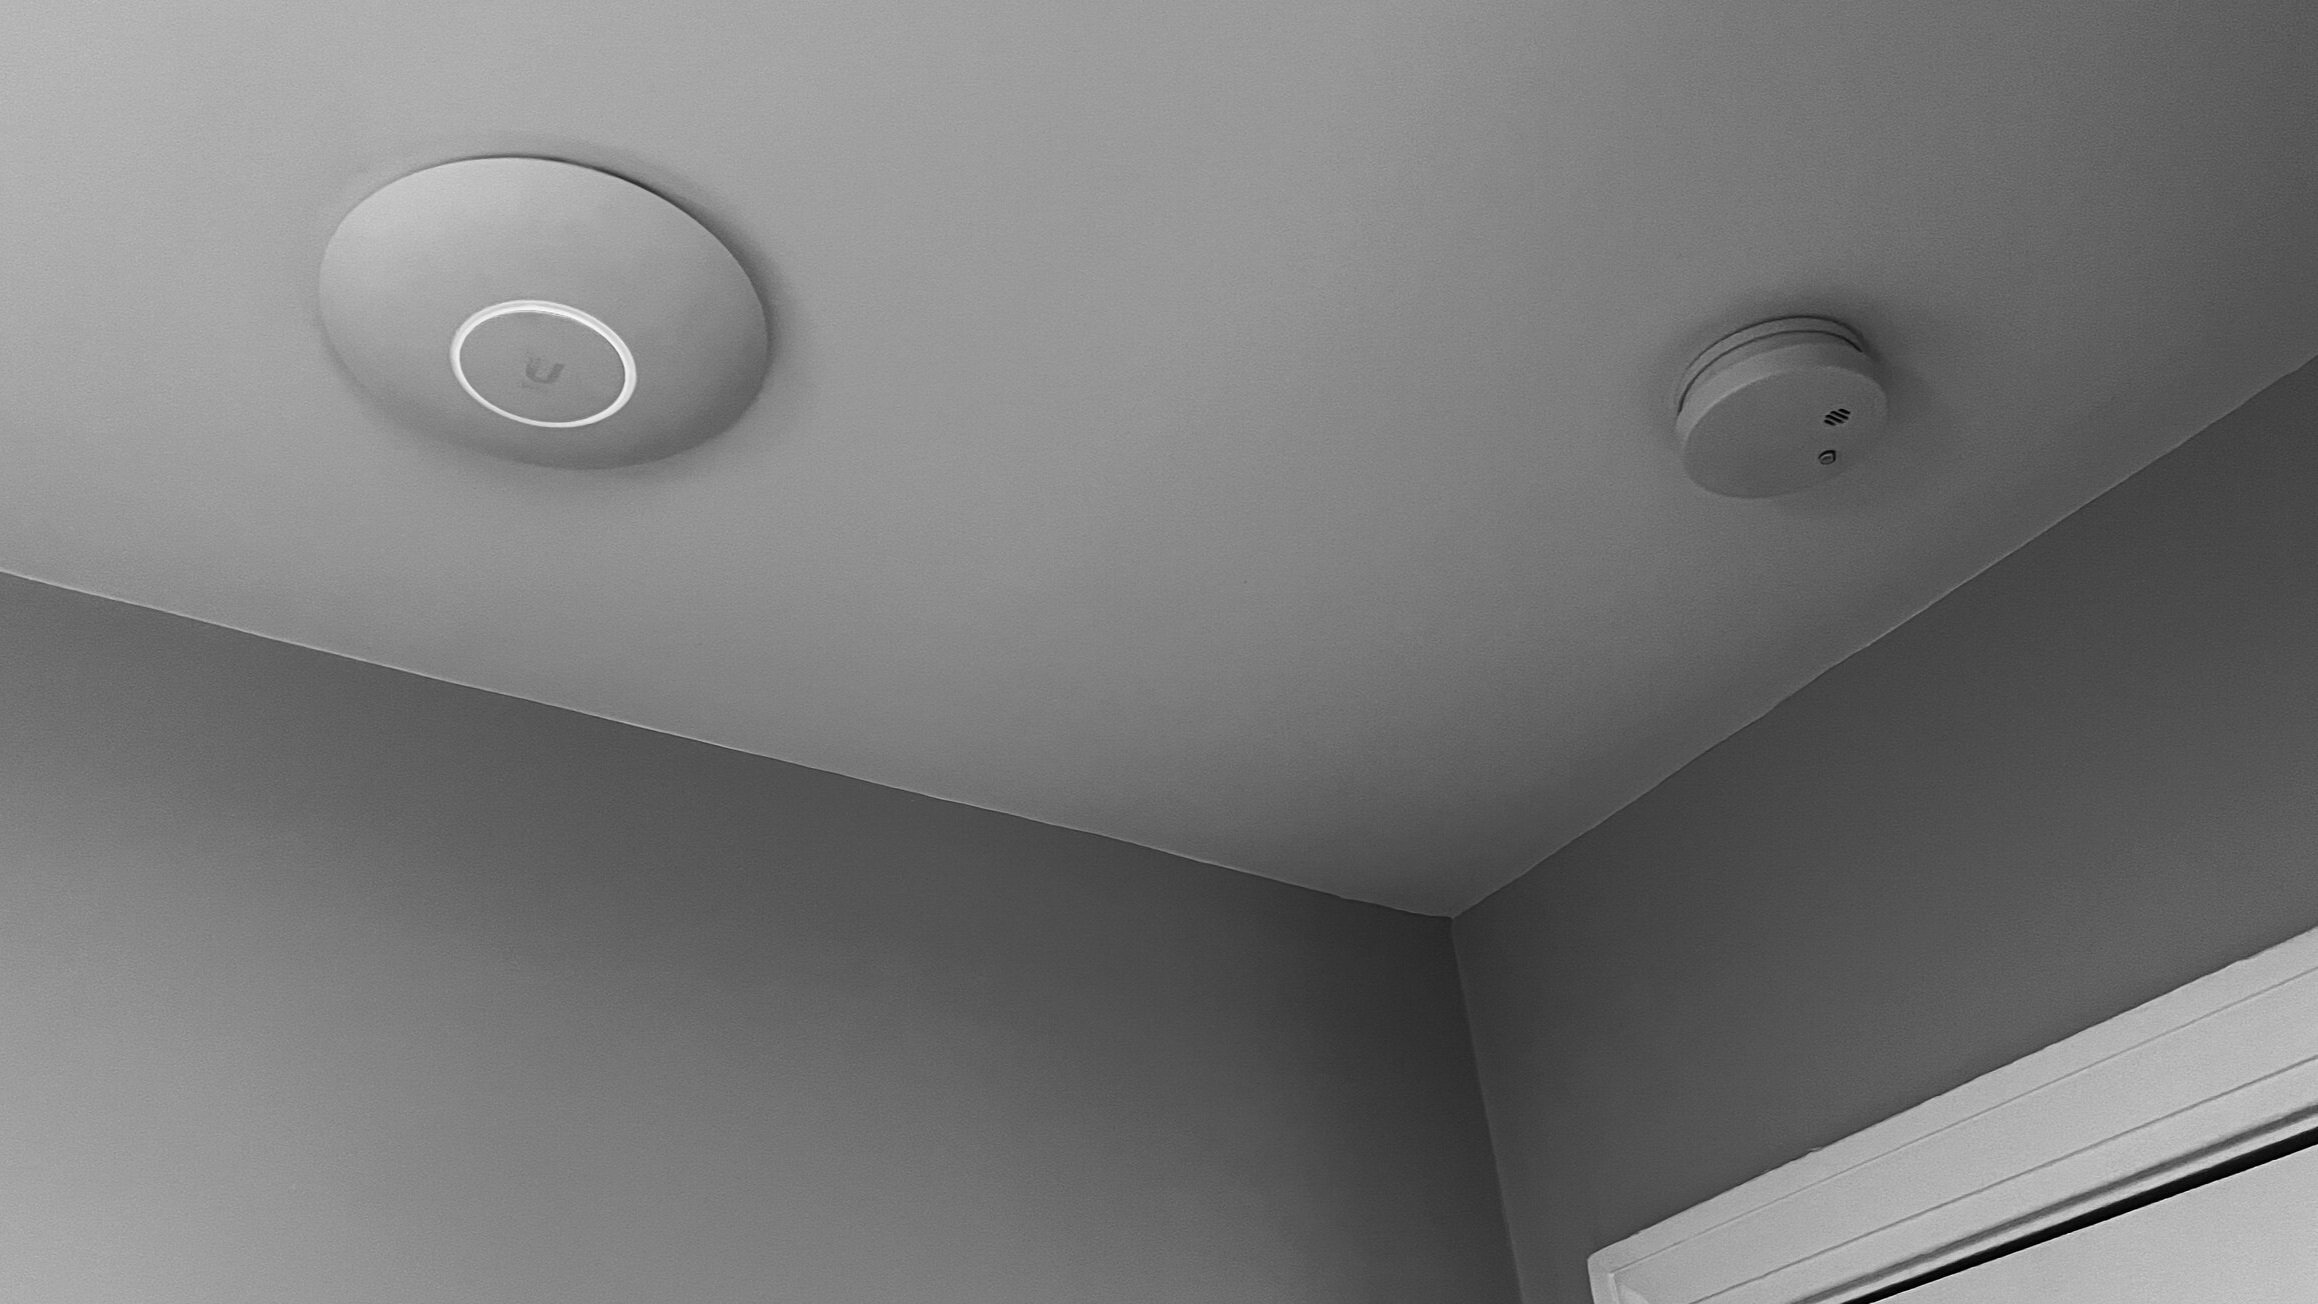
2nd Floor: U6-Pro
AC-Mesh mounted outside on the 2nd floor
Outside, I installed the AC-Mesh high up on the corner of my house. This covers my front and side yard well, and gets a usable signal into my back yard. I mainly chose the AC-Mesh because it was in stock, but it’s a good outdoor AP. In an ideal world I’d have a FlexHD or Wi-Fi 6 AP there, but the AC-Mesh is more than enough for my limited outdoor use.
Wired Settings
The configuration of my home network is basic. Most of my hosts live in a single subnet. I also have a management network and a guest network. I tinker with things and make temporary setups based on what I’m working on, but I prefer to keep it simple.
To avoid common IP conflicts, I’m using a /16 in the high part of the 10.x.x.x private IP range. From there, I subnet down to my LAN, management, and guest network which each get their own /24. This is the most common LAN network size, giving me 254 usable IP addresses to work with. My LAN range is 10.250.10.x/24, but it could easily be a smaller subnet with a different IP range. My home networks are always temporary, so I’ve learned to not sweat the details.
I have a few firewall rules to prevent guests from reaching anything local, but that’s about it. In the past I have run PiHole for ad blocking and pfSense as my firewall, but I’m not doing anything that justifies it right now. I am planning on putting my pfSense host in front of the UDM and creating a physically separate network, but I’m saving that for another boring weekend.
Wireless Settings and Channel Choice
I spend more time on the wireless side. In general, I setup my UniFi APs with these settings:
5 GHz: 80 MHz channel with high transmit power
2.4 GHz: 20 MHz channel with medium or low transmit power
Band Steering: off
Wi-Fi AI and Auto-Optimize: Off
You need wide channels for the fastest Wi-Fi, but it’s not as simple as picking the widest channel you can. There are only two 80 MHz channels in 5 GHz which do not intersect with DFS, so channel selection is just as important. Larger, denser networks have better results with smaller channels. 80 MHz channels work well in my house. They might not in yours.
5 GHz channels are labeled 20 MHz apart. 40/80/160 MHz channels bond multiple 20 MHz channels together, allowing for more data to be sent at once. The main downside is they require a strong signal, and are more affected by interference. If you think of a 20 MHz channel as a highway lane, wider channels allow you to use 2, 4, or 8 highway lanes at once. This allows for more throughput, but there is a cost. If there is traffic in any of those lanes, transmissions can be disrupted.
The actual use of these bonded channels is decided per client, sometimes on a frame-by-frame basis. Beacon frames are sent on the “primary” 20 MHz channel. After the client hears a beacon and associates to the network, the AP and client negotiate the use of the extra lanes. If using the full 80 MHz results in errors in transmission, the devices will step down to a smaller section of the full channel width. This is done to avoid excessive re-transmission and conserve airtime.
In the UniFi Controller the channel you select is the primary 20 MHz channel, where beacon frames are being sent. This means that using 80 MHz channels, you’re going to be using the channels surrounding the specific 20 MHz channel you picked. This is typically shown with the channel number follows by +1 or -1, but different vendors show it different ways. If you want to read more about channel allocation, Ekahau has a great blog post which explains it.
I’m using the following channels on my access points:
UDM: 106 (DFS)
U6-LR: 36
U6-Pro: 149
AC-Mesh: 44
Note how I’m using two different primary channels for the U6-LR and AC-Mesh, but they are consuming the same slice of spectrum. If I was running 20 or 40 MHz channels, I’d be able to put every AP on their own unique channel. I’m making that tradeoff for faster speeds. If I had more APs or more users, I’d use smaller channels.

Things become a little clearer when you see how channel selection and spectrum interact
Advanced UniFi Wireless Settings
I only change advanced settings when I need to. I leave minimum RSSI, data rates, band steering, or other advanced settings at their defaults. Those settings do matter, and they can improve things if you are trying to solve a specific problem. For me, they are unnecessary. As an example, I encourage good roaming behavior through power levels and AP placement, rather than relying on band steering. One exception is turning Multicast Enhancement on, because it helps smart home devices be less stupid.
The only way to know if something works is to test it. I’ve been living with this network for a while and I haven’t noticed any issues. It’s overkill, but that’s how I like it. I had no problem living on mesh, but now I’m able to fully utilize my fast Internet connection. That is comforting for a networking nerd like me.
Wi-Fi 6 access points with Ethernet backhaul and wide channels are capable of many hundreds of Mbps. That is what I get at every location I’ve bothered to check. Adding an outdoor AP was not necessary, but it’s been convenient for doing some work in my back yard, and for streaming some lawn mowing entertainment. It doesn’t matter where you are in my house or my yard, the Wi-Fi does not suck. Mission accomplished.
I’m already planning my next series of upgrades. I want to replace my amateur cable runs with something more permanent. I want to install some Ethernet wall plates. I want to create a physically separate network for use as a networking lab. I want some 10 Gbps links. None of these are required, but they will get me closer to the home network I’ve always dreamed of.
I still haven’t found Zen in my home network, but I’m getting closer. Until then I’ll be relaxing on the weekends, ignoring those leaky pipes as long as I can.